
By Denis Sandmann
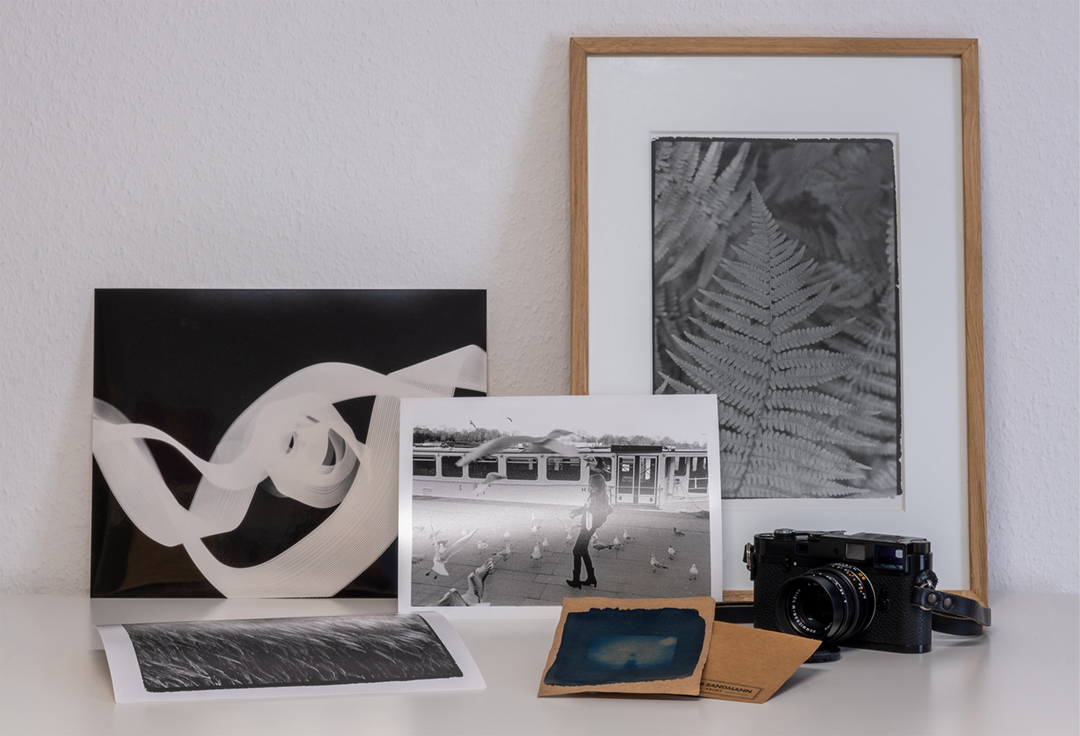
The DIY Darkroom
Scanning negatives isn’t everything! Or at least that’s what I thought as I looked through eBay classifieds for a used enlarger that I wanted to install in my storage room. The romantisized idea of holding my first prints in my hands was the analogue perfection that I was hoping for. As most 21st century modern photographers, I printed with Lightroom and my Epson Expression XP-960. However, there was always a gnawing suspicion that my results were never quite up to the quality I had hoped for. Was it the wrong paper? Wrong ink? Did I need to buy a better printer? Never mind. Black and white darkroom prints were really my next big goal in my photographic journey. Or, as Tyler Shields once said,….the darkroom print has no digital equivalency. (I’m paraphrasing)
A few days later I loaded a Kaiser enlarger with accessories and a stack of old photo paper into my trunk. However,….I was totally unaware of what I had gotten myself into. Similar to when I bought my first analog camera at a flea market. The excitement was palatable. 🤩 But I think us photogs always get those butterflies in the stomach with any new, (or old), piece of gear.
OK. Let’s keep it real. Failure No. 1; Trying to set up a darkroom in my storage room was a bad idea. The first moments of happiness quickly disappeared when, after my first print, I had to go back into that claustrophobic 2 sqm chamber, (22 sq ft), to make my second print. Maybe I hadn’t thought this through. Digital is so easy. But easy isn’t always better, and can not always suffice when chasing a vision. Is digital really just “good enough”? Perhaps I need to look again at more color profiles and different papers for my inkjet printer.
Yes. These questions kept me awake at night. You’re not alone. Anna felt the same way. Not with photography, but with art. More space was needed.
More Space for my Photographic Art!
Sounds good. A decision has been made. Everything was changing here anyway. Who says you have to live in the living room and sleep in the bedroom? No one. Exactly. That’s why we thought we’d turn the bedroom into a darkroom/artist’s retreat and spend our waking hours on art and our bedtime on a sofa bed. (assuming everyone is in agreement, and no one suffers from back problems) Point is, finding a suitable space in you adobe is critical. However, our clothes had nowhere else to go, so they stayed right there in the “darkroom”. 🤷♂️
Darkroom Requirements
Our new sacred halls of creative endeavors should meet the following criteria:
- Enough space to develop and store pictures.
- A sufficient work surface for two people.
- Complete darkness for my darkroom work.
- An area to separate clothes from paint, (art), and chemicals. (photography)
What Do You Need for a Darkroom
You don’t need much;
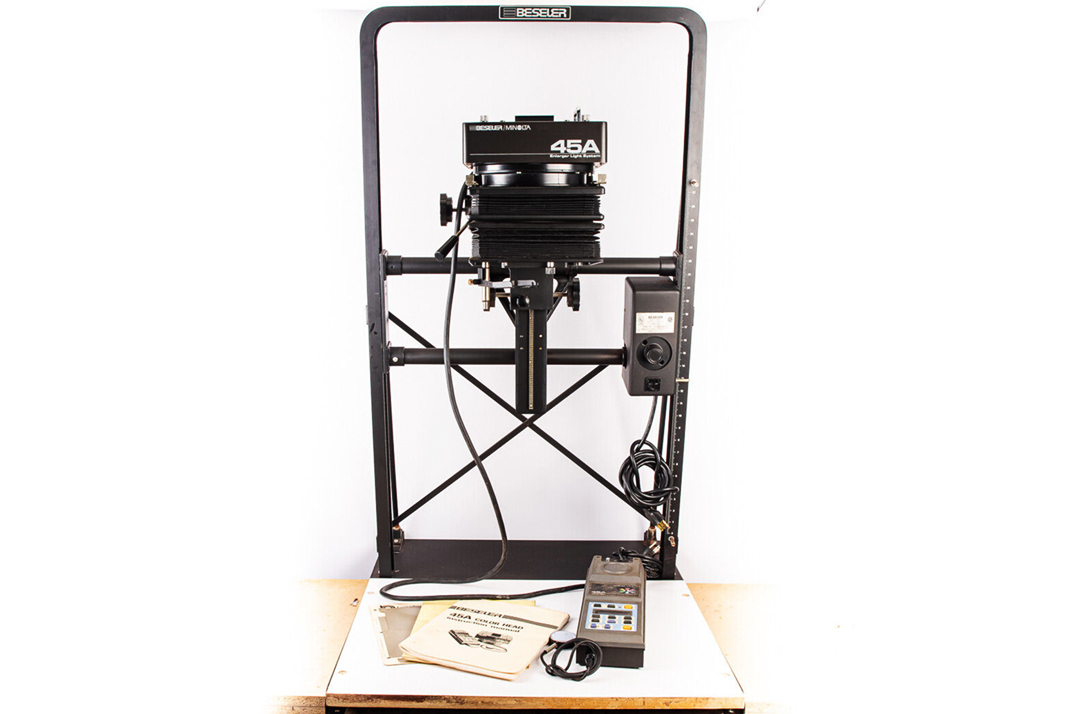
- An Enlarger
- Three appropriate size developing trays (developer, stop bath, fixer)
- Development tongs
- Dust free cabinet for photo paper
- GraLab or similar timer for the enlarger
- Enough storage space for easels, paper, and chemicals
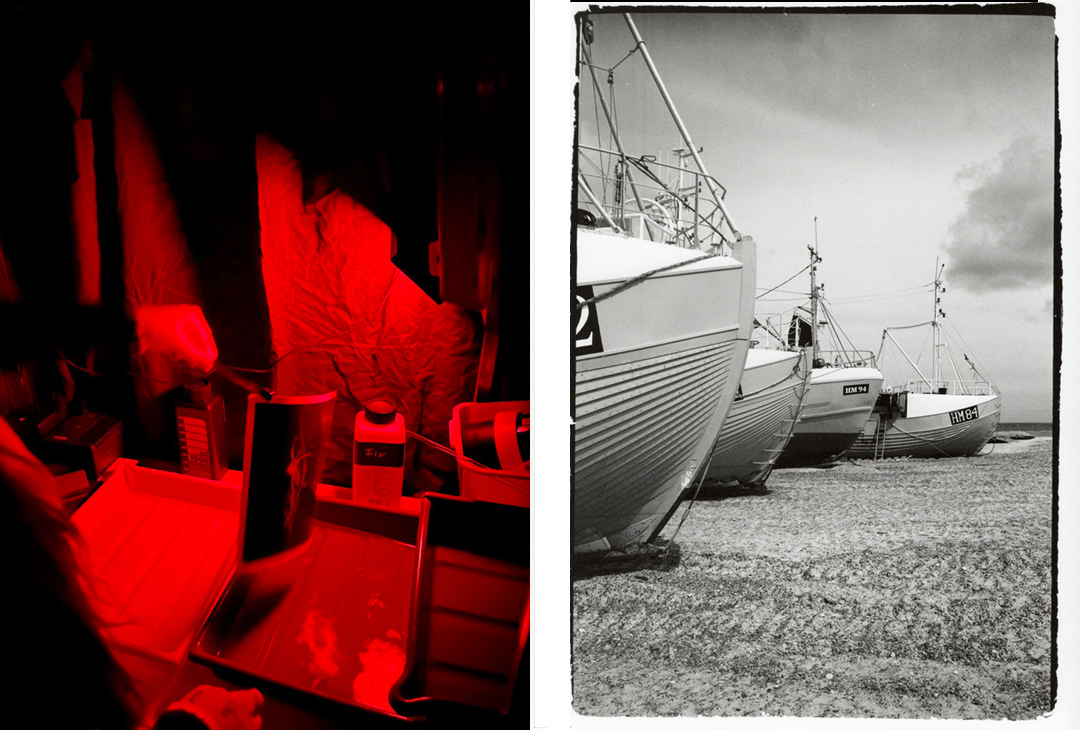
- Sufficient red light for good visibility (a cheapo Amazon Safe Light is fine)
A Budget Design
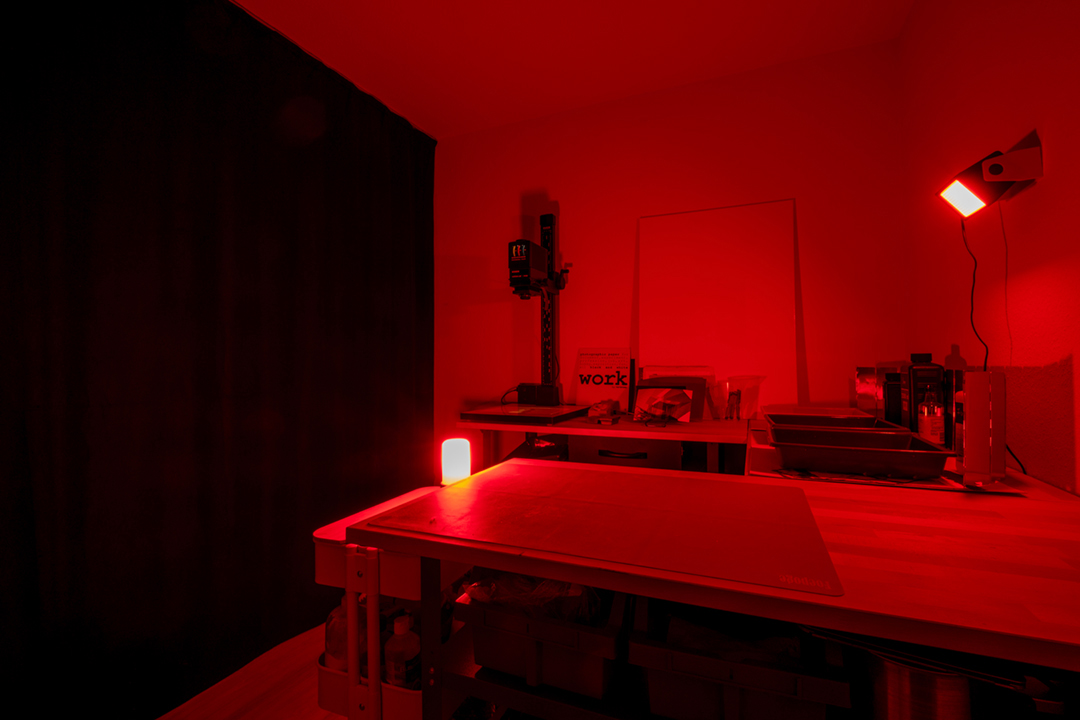
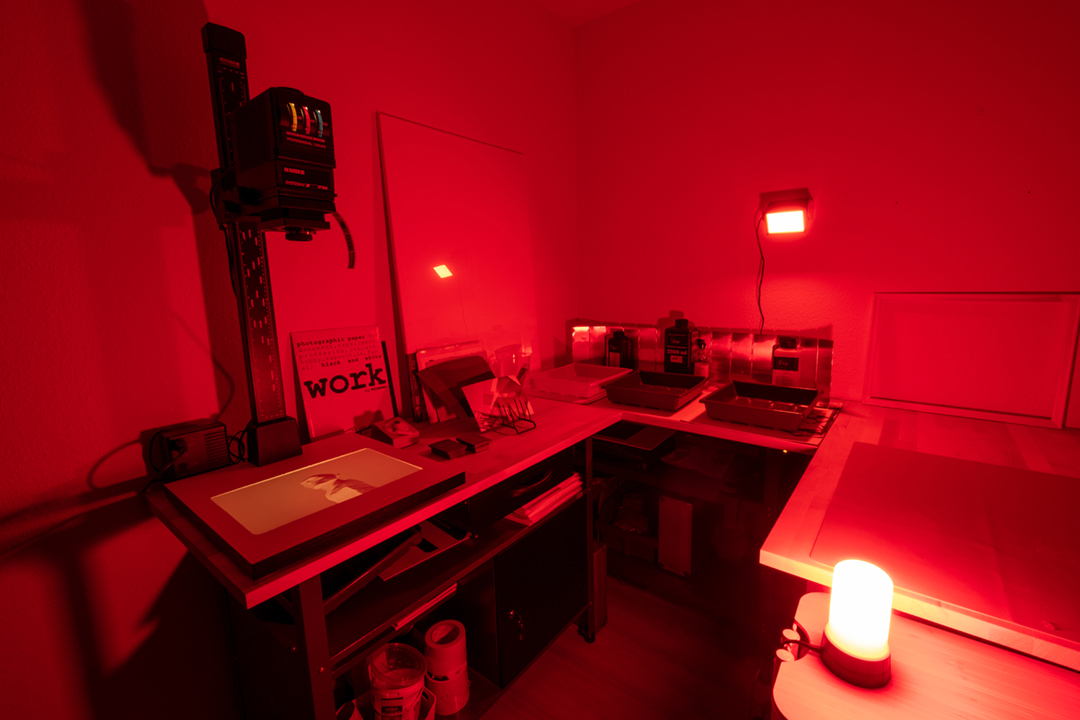
The work surface consists of simple workshop tables with base cabinets or shelves in the lower area. One of them also has a drawer near the enlarger for small items such as scissors, brushes, etc. On top of it is the enlarger, and right next to it are the developing trays. The tables form a U-shape, and you can reach everything without moving during exposure and development. We have placed two red light lamps as far away as possible from the photo paper (enlarger and developing trays) so that the paper is not overly exposed to red light.
FYI: (Of Course)
Light can sneak into the darkroom, but few people realize that even a darkroom safelight can fog paper. Photo paper can spend several minutes under a safelight before it is fixed. However, if the safelight is overly bright, placed too close or is the wrong color, it can ruin a great print. But offsetting any perceived fussiness in the process,… as Magnum Master printer Pablo Inirio said, “Collectors and galleries still want prints on fiber paper,…”
Darkening the Room
Darkening the room was the next problem we had to solve. If you can, you should choose a room without windows for a darkroom. But this is usually a cramped storage room, as mentioned above. The ventilation is very poor, and in the summer it is almost unbearable in there. But everyone’s situation and spaces are different. But I was good with my room having a window that needed to be darkened, since I needed the ventilation. Also, my space needed to accomodate a share with a person working with acrylic and oil paint. So, as you can see, this was a multitasking space. Most photographers are dealing with a singular use environment.
So we got an extra heavy Kalmuck curtain from Molton Markt, (in Germany), and a corresponding aluminum curtain rail for the ceiling. Attached with appropriate rollers, the curtain can be hung in the aluminum rail and pushed from one wall to the other. Similar Blackout Curtain material can be had from Amazon in North America.
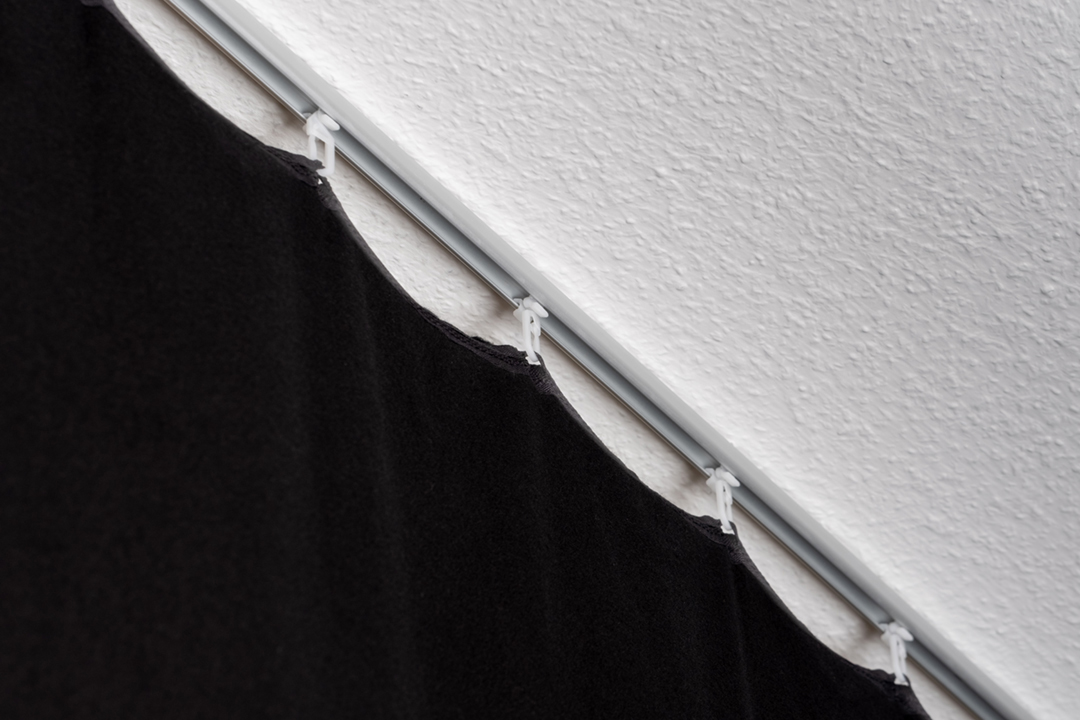
Our version came with a “high head,” i.e., an extra piece of fabric over the ruffle tape, so that the curtain rail is hidden and the curtain really reaches from floor to ceiling. The black of the curtain literally swallows all the light. If you then close the window blinds and place a towel in front of the door to the hallway, it is really completely dark. This worked extremely well, and I was happy that we didn’t have to seal the window with aluminum foil and tape. The curtain not only works as a blackout curtain, but also separates the multifunctional room and protects our clothes that are on the window side of the room. (Uhhh….this is still a semi- bedroom)
Working in the Darkroom
What can I say? It’s a dream. (well, poor man’s dream😁) We have enough space. We can also just leave things as they are and move on the next day. An area specifically designed for photography and art is worth its weight in gold. You stay productive because you simply have the space.
The sink is in the bathroom, but not particularly far away. So far, in addition to the three developing trays for developer, stop bath, and fixer, I have simply used another empty developing tray to transport the photo paper for washing in the bathroom. Yeah, it would be nice to have a dedicated “wet space”, but I take solace in knowing most of the greats throughout history sufficed with a bathroom. (Lucien Clergue)
Of course, this isn’t a professional darkroom with all the bells and whistles you could imagine, but if you want, you can make really high end, archival prints here. And that’s what we’ve done over the last few months. It was actually more fun than I imagined. Maybe this will inspire you to build your own darkroom. Maybe not, especially considering my Rube Goldberg approach. Remember, these days you can easily find an old enlargers, easels, enlarger lenses and more on eBay dirt cheap. (alright, the “dirt” is getting more expensive these days) A bit of chemistry, some photo paper, and you’re ready to go.
You can watch the building of the darkroom on YouTube: (IN GERMAN)